Numeric Nodes
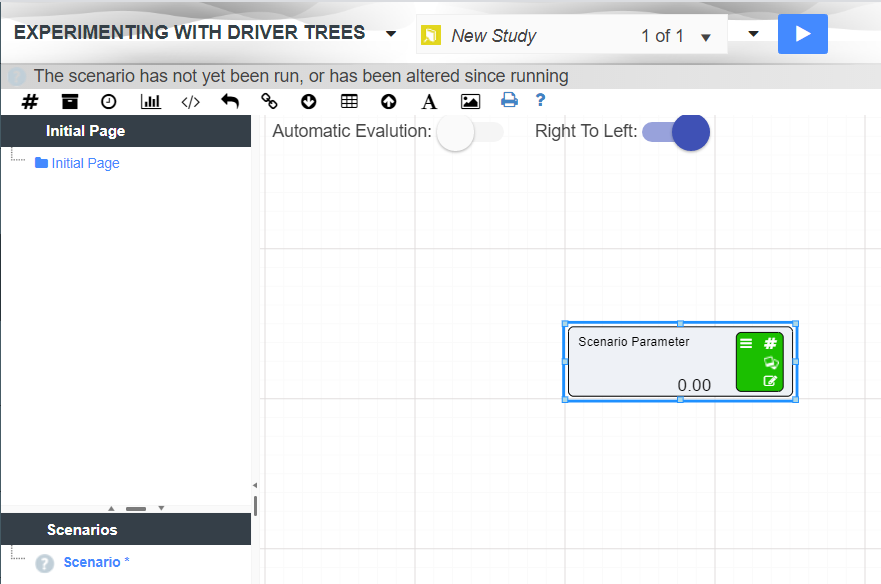
There are many different node types that can be used to create Driver Models. The simplest of these nodes is the Numeric node. Numeric nodes hold onto values to be used in the application. They are placeholder nodes. They are assigned values that will not be used until they are attached to a:
- Calculation node; or
- Prior Value Node.
They are also excellent at demonstrating how to edit, connect, and use nodes to create a Driver Model.
To show you how to use a Numeric node we will set up two numeric nodes in preparation for the following slide on Calculation nodes.
To set up a Numeric nodes:
- Open up your Driver Model Application.
- Click on the “#” symbol and drag it onto the workspace to create a Numeric Node.
- In the bottom right of the node, in the green box is the edit symbol for the node. Click on this to edit the node’s properties.
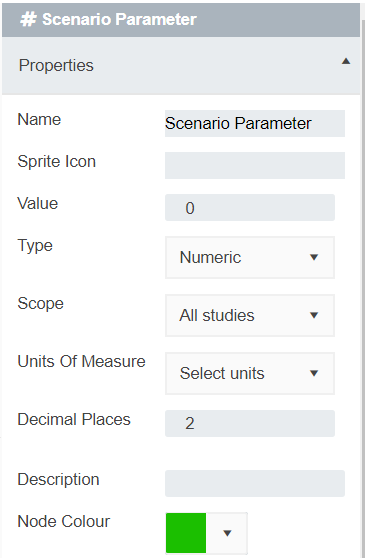
- An editing window will appear on the right hand side of the screen.
- Change the name of your Node to “First Input”.
- In the value section of the editor put the value 1.
- Drag another Numeric node onto your workspace and place it underneath your First Input.
- Change this Node’s name to “Second Input” and make its value 2.
You probably noticed that in the editing window of the Numeric node you could set:
- The Scope;
- Units of Measure;
- Decimal Places;
- Description;
- Node Color;
- Whether to Publish the Nodes or Not; and
- The Node Type.
All of these things can be changed in a Numeric node. For example, if we were going to set a value of $50, we would just have to set the units of measure to $ and make sure that the number of decimal places visible was set to 2.
This list in the editing window is the same for the following nodes:
- Calculation;
- Asset Parameter;
- Timeseries;
- Distribution; and
- Prior Value.


