Flexing Inputs
Flexing is often the best way to answer the “What if” question for fixed input values in your model.
Flexing creates a range of scenarios using the specified start value, final value and a step value which determines the increment used.
There are two methods available for users to flex inputs.
From the scenario list:
- Right-click on an existing scenario from the scenarios list.
- Select “Flex” from the context menu.
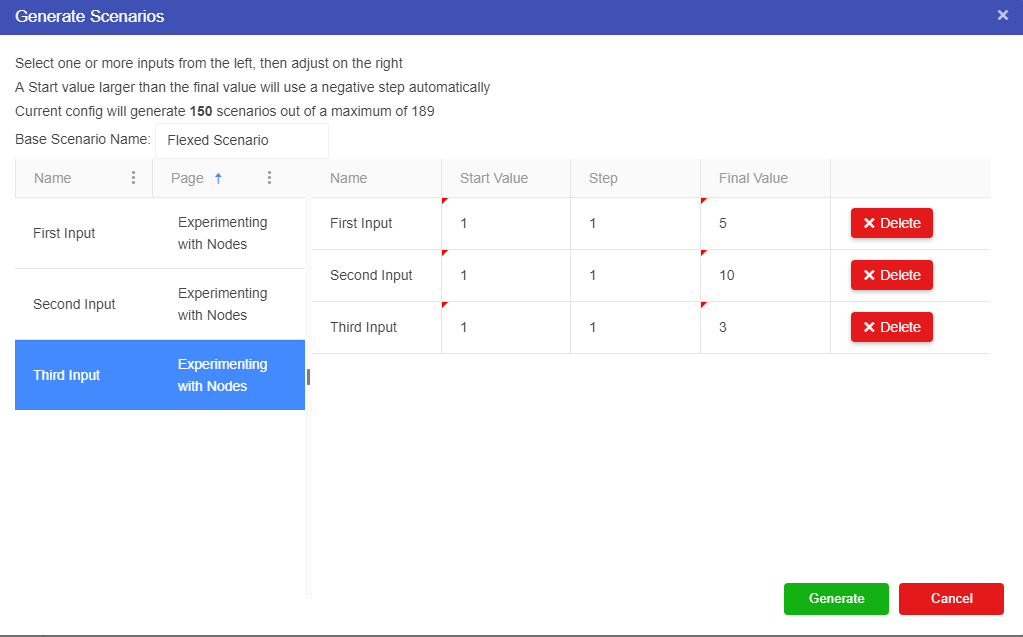
- A window will open which contains two grids. The grid on the left contains a list of all available fixed inputs (numeric nodes and asset parameters) and the grid on the right contains inputs which have been selected to be used for flexing.
- Select the input/s you would like to flex.
- Specify a “Start Value” or keep the default.
- Specify a “Step” or keep the default.
- Specify a “Final Value” or keep the default.
Note
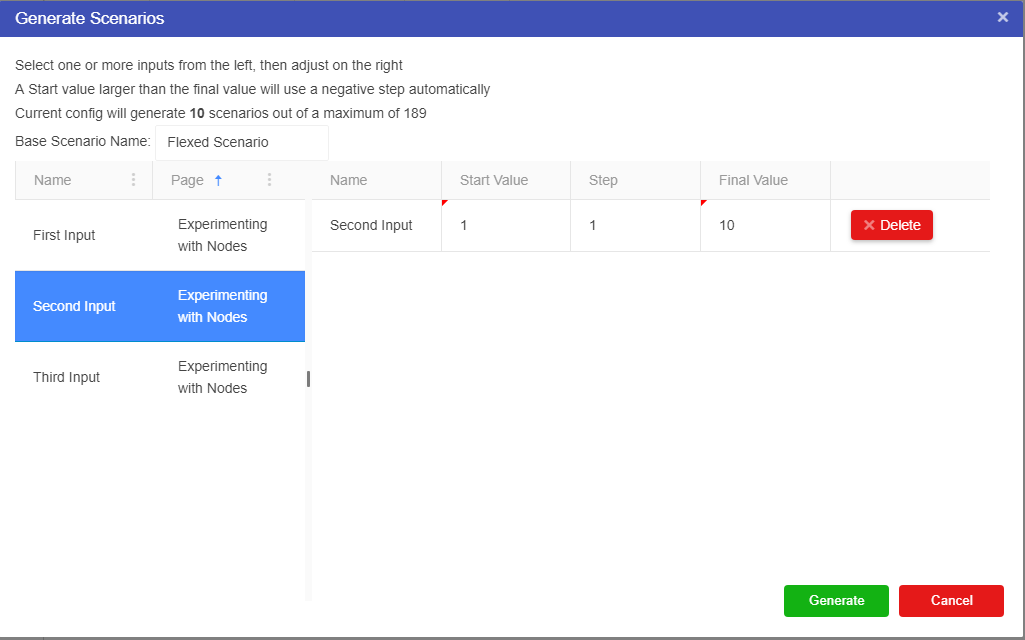
There is a hard limit to the number of scenarios that can be flexed. This is displayed in the flexed scenario window.
- Click the “Generate” button.
- Click “OK” on the confirmation window that appears.
- Scenarios will be generated with new values from the stated starting value through to the stated final value.
From a fixed value input node:
- Right-click a fixed value input node. This can be a numeric or asset node, or a reference node which refers to one of these node types.
- Select “Flex” from the context menu.
- When the flex scenario window is opened using this method, the selected input node on the canvas is automatically added to the flexing grid.
A page filter is also set for the “Page” column to match the current driver model page. This can be cleared in the column settings.
Info
It is possible to have multiple nodes selected on the driver model canvas when opening the flex window using this method. If this is done, each input parameter node selected will be added to the flexing grid.
- Select any additional input/s to flex.
- Specify a “Start Value” or keep the default.
- Specify a “Step” or keep the default.
- Specify a “Final Value” or keep the default.
- Click the “Generate” button.
- Click “OK” on the confirmation window that appears.
- Scenarios will be generated with new values from the stated starting value through to the stated final value.
Flexing can be performed for more than one input at a time. For example, you could flex one input and then a second input at the same time with the same values. The model will create these scenarios as long as it has not reached the limit of scenarios that it can generate.