Setting up the Calculation Node
The Calculation node for this example will take the two input values and multiply them together.
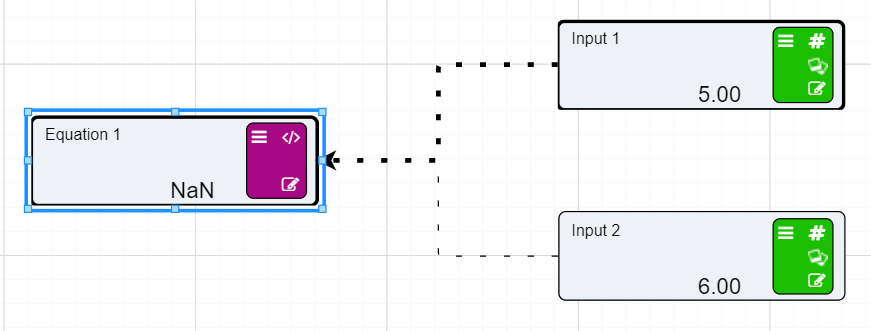
Now when the new Driver Model was created, there are already two Calculation nodes attached to two Numeric nodes. We only need one of the Calculation nodes so click on one of the nodes and either:
- Right click on the node and select delete from the options; or
- Press delete on your keyboard to delete the node.
For the other Calculation node:
- Rename the node to Equation 1.
- Make sure that the Numeric nodes are connected to the Calculation node.


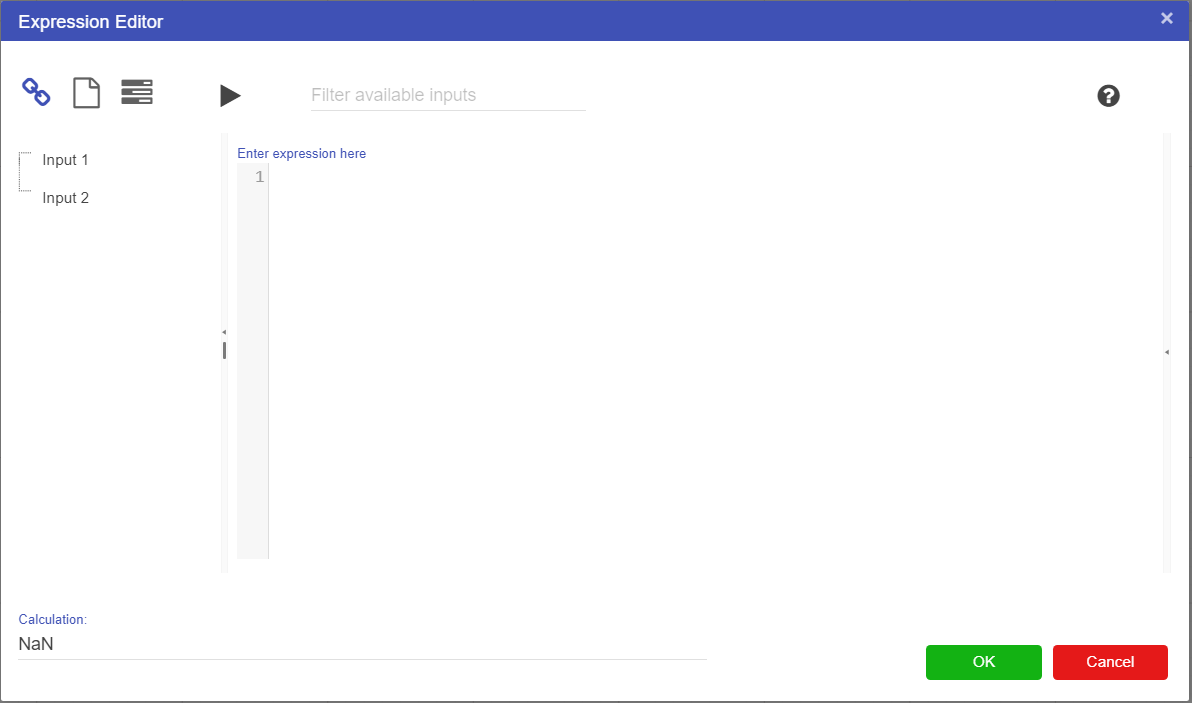
- Double click on the NaN to enter the Expression Editor.


- Drag Input 1 onto the expression page.
- Place the “*” sign next to it.
- Drag Input 2 onto the expression page.


- You can also copy and paste in the following line of code:
[Input 1]*[Input 2] - Press OK to save and close the editor.
- Turn on the Automatic Evaluation to see the immediate results.


The node will then do the calculation and display the results.
Note
That until an expression is entered into the Expression Editor that involves the attached nodes, the connecting lines will remained dotted. When the node is used in a calculation the lines will become solid when the node calculates the result.
Warning
Make sure that the Publish to Results tick box has a tick in it, otherwise when we go to the results tab and try to analyse the results we will not be able to view any of the results generated. The same is true for all nodes in the Driver Model.