Beginning the Driver Model
Before we start, we need to delete the demonstration nodes that are created by Akumen when a Value Driver Model is created. Click and hold on an area of the canvas, and drag the mouse so all the nodes are covered by the square. Release the mouse, and all nodes will be selected. Hit the delete key and accept the prompt to delete all of the nodes.
Our Driver model will be modelled in three parts:
- First, we will be modelling its operational income;
- Then we will be adding in the fixed overhead costs; and
- Last, we will address the shop’s cash reserve at the bank.
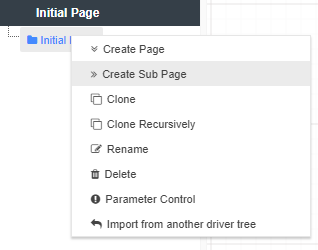
Because of this we will need three Driver Model Pages. On the left hand side of the screen you will see the pages window. We will create two sub pages from the page titled Initial Page so that we can create the different parts of the Driver Model.
- Right click on the page titled Initial Page.
- Select Create Sub Page.


- Repeat the above steps again until you have two sub pages and one page.
- Rename the Initial Page to Bank Account by right clicking on the Initial Page and hitting rename.
- Rename one of the Driver Model Pages Operational Income.
- And the other page Fixed Costs.


Now go to the Operational Income page. On this page we will start building our Driver Model based on the operational income.
Jack knows from experience that one cup of coffee from his Italian coffee machine costs $0.5. This is the value he would like every app to use. Hence, we put it into the Asset Library.
- From the Palette, click and drag an Asset Parameter node onto the workspace.
- From the popup window, select the Coffee Machine.Cost Per Cup asset parameter and click ok.
Info
The Asset Node on the Driver Model has a permanent link to the Asset Library. If the value of the property in the Asset Library changes, the new value will propagate to all the applications that use that property. Akumen will also create an audit trail for this property which allows users to confirm from where the value came thus giving you full traceability of, and control over the crucial numbers in your business.
- From the Palette, click and drag a Numeric node onto the design surface underneath the asset node.
- Click on the name to rename the node.
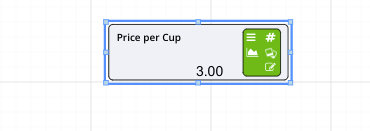
- Rename the node Price per Cup.
- Click on the value and change it to 3 (this will be our starting price for a cup of coffee).
Info
You will notice the different colours indicate different nodes. For example, a Numeric Node is green, an Asset Parameter Node is blue. For more information on the different types of nodes click here.
- Click on the properties symbol on the node
 to bring up the properties bar on the right side of the screen.
 - There will be a tick box called Publish to Results in the properties bar. Ensure this check box is ticked so that this value gets published to the Data tab.


Warning
The Publish to Results tick box must be ticked in all nodes that you wish to see the results for, otherwise the values for that node will not appear in the Data tab. The nodes that are published to results have a small chart icon, and publish to research have a “hamburger” above the publish to results icon.
Now that we have our two starting values we can add our Calculation node to work out how much money would be made per cup of coffee sold.
- From the Palette, click and drag a Calculation Node onto the design surface to the left of the asset and numeric nodes.
- Rename the node Profit per Cup.
- Hover over the Asset Parameter, and click and drag a link from the output of the Asset Parameter to the input of the Calculation node (Profit Per Cup).
- Hover over the Numeric node (Price per Cup), and click and drag a link from the output of the Numeric node to the input of the Calculation node (Profit Per Cup).
- Click on the value of the calculation (displayed as NaN which means Not a Number) to pop up the expression editor screen.
- Click and drag the first input, Price per Cup (the Numeric node) from the left panel into the expression editor on the right.
- Click after the text, which should look like [Price per Cup] and add a - (subtract) symbol.
- Click and drag the second node input, Coffee Machine.Cost Per Cup (the Asset Parameter node) from the left panel to the expression editor on the right.
- Confirm the calculation looks like
[Price per Cup]-[Coffee Machine.Cost Per Cup]. - Click OK to save the changes. Click on the “Automatic Evaluation” toggle to check if the calculation is correct - the calculation value should update with the correct number.