Calculation Nodes
Calculation nodes are probably the most important node in a Driver Model. They take inputs from the different nodes and use their values in mathematical expressions to produce an output value.
Calculation nodes do not need to have inputs to work. Expressions and values without the input of the other nodes can be entered into a Calculation node to produce a value. However, anytime you wish to change that value you will need to go into the expression editor within the Calculation node and manually change the value. This is why we recommend that for any expression entered into a Calculation node there is always a node which holds the input value so that:
- Values can be easily changed during scenario analysis; and
- So that users can see what values are going into the Calculation nodes.
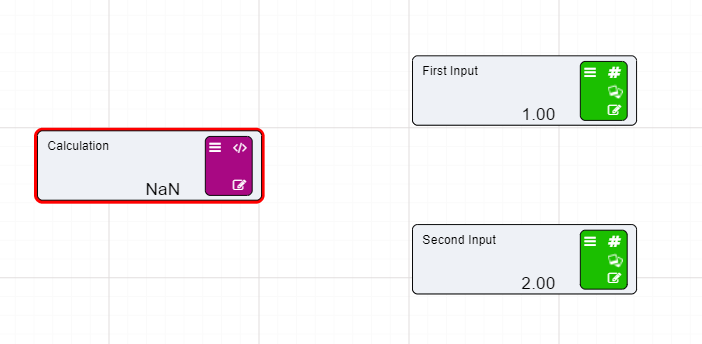
On the previous page we set up two Numeric nodes in a Driver Model workspace. We will now demonstrate how the Calculation nodes work by using the previously created Numeric nodes and putting them into an Expression in a Calculation node.
To set up a Calculation node:
- Drag a Calculation node onto the workspace to the left of both your Numeric nodes.
-
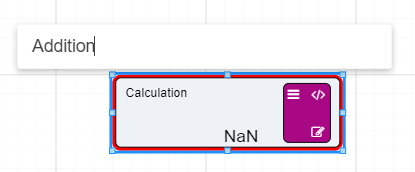
Change the name of the Calculation node by clicking on the current name of the node and waiting for an editing bar to appear above the node.
Note
This is how you would change the name of a node without going into the editing bar.
-
Rename your Calculation node to Addition.
Now that we have set up our Calculation node we will need to add the inputs to the Calculation node.
- Hover over your Numeric node First Input and select the icon on the left-hand side of the node.
- Drag this to the right-hand side of our Calculation node.


- Repeat the above steps to attach the second Numeric node.
You will notice that the two Numeric nodes are now connected to the Calculation node by dotted lines. These lines mean that the inputs are connected to the Calculation node but they are not being used in the expression. The lines will become solid once we add these values to our expression.
Expressions in Calculation node are written in a similar format to that of an Excel expression.
To get a result from the Calculation node we have to set up an expression. To set up an expression:
- Double click on the NaN at the bottom of the Calculation node.
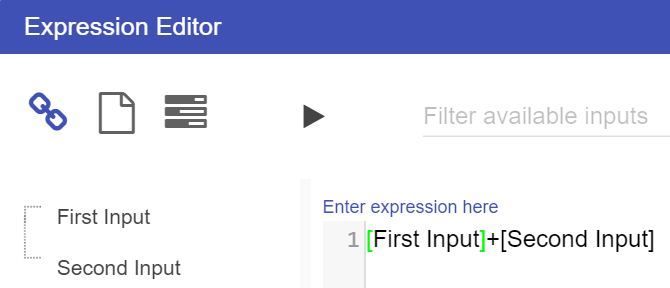
- This will bring up the expression screen.
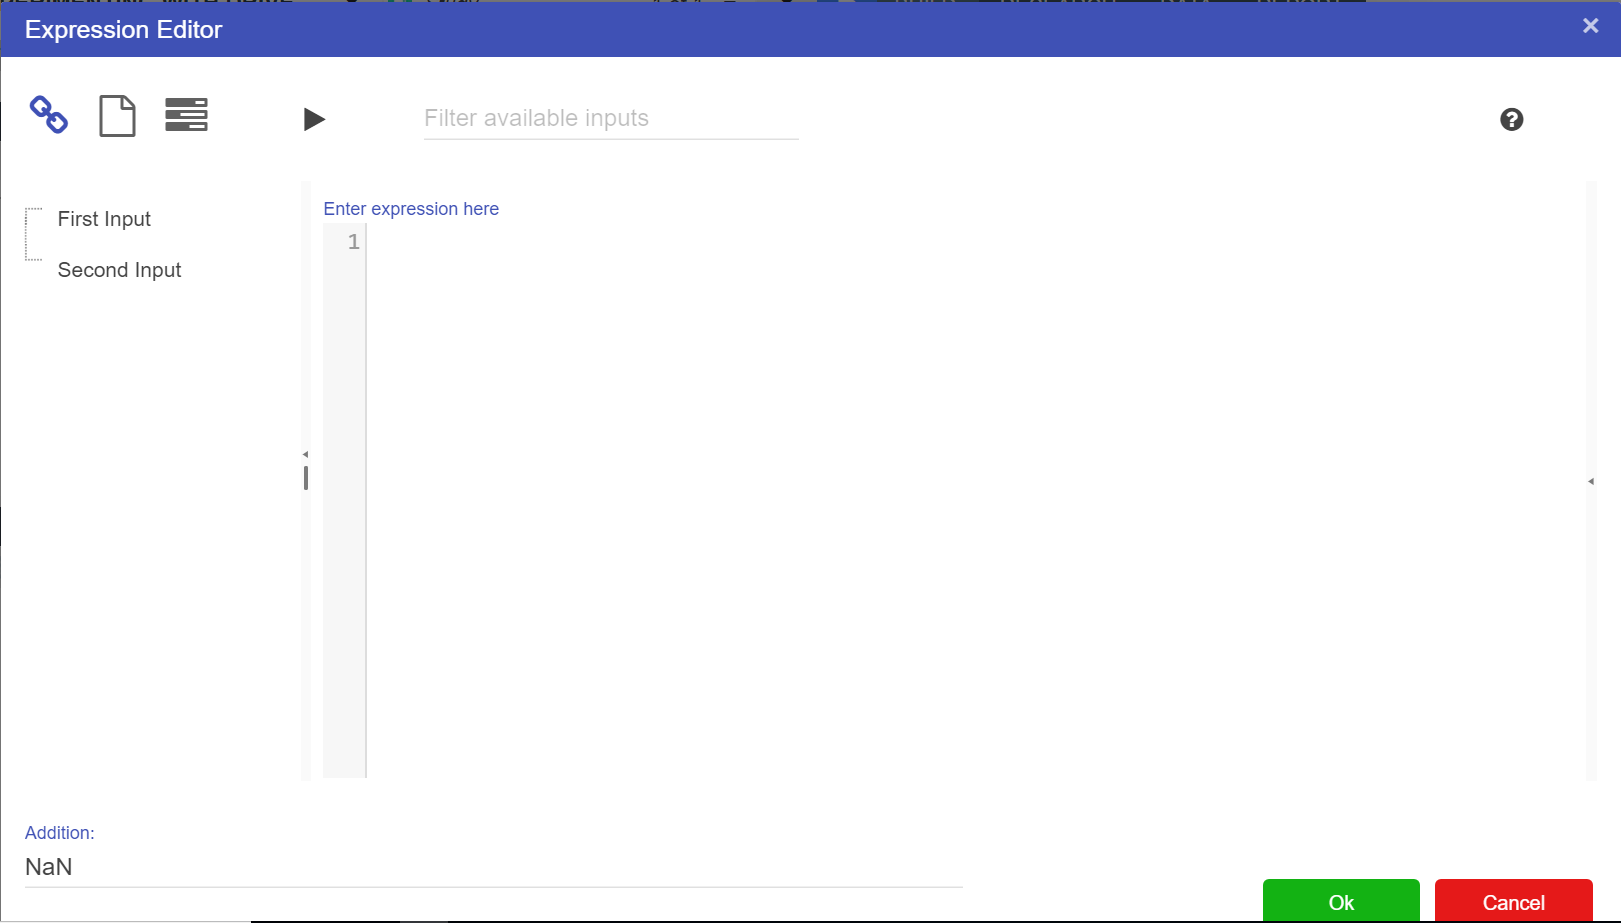
 For this example we will add the two Numeric nodes together, but more complex expressions can be written in the expression editor.
 - To add the two Numeric nodes together:
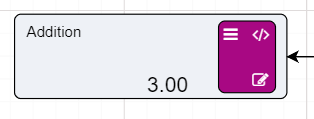
- The window will close and the value for our expression will still read NaN until you set Automatic Evaluation to on.
Notice that the dotted lines between the nodes will now be solid as the values of those nodes are now in use.
Info
References to nodes in the Expression Editor must surround the node name with [ ]
When Calculation nodes are given inputs, they become dependent on those nodes. So, if for example our First Input Node was to change from 1 to 5 the calculated value would become 7. And if the Second Input was to change from 2 to 6 then calculated value would become 11.
Calculation nodes do not have to remain the same in terms of expression. Expressions can change at any time. Should the expression change from Addition to subtraction all users would need to do would be to go into the expression editor and change the “+” to a “-”. This would result in the value going from 11 to 1. If we wanted to divide 5 by 6 we would put a “/” in between the First Input Node and the Second Input Node. And if we wanted to multiply the two nodes, we would adjust the symbol from a “/” to a “*”.
There is no limit on the amount of inputs, however some functions do have a limited number of inputs. They do have to be put into the expression though before their values will be used by the node.
Info
Code comments can be used in calculations using // syntax.
// Calculate the average
avg([node])